Showing posts with label Lync. Show all posts

Tuesday, 16 April 2019

I have AADConnect Directory Synchronisation and users do not provision for Skype for Business Online


Just a quick one this morning. I recently I had an issue where a customer did not have users being provisioned for Skype for Business Online. The customer had remnants of a legacy Lync 2013 on-premises deployment and they were using AADConnect for directory synchronisation.

Digging in the tenant I could see that even with the Skype for Business Online license enabled, even after waiting several hours if I used Get-CsOnlineUser in the Skype for Business Online Management Shell, no users were there.

This led me to my good friend Jaap Wesselius Blog Post here - Aha, a possible eureka moment! This must be the issue. Unfortunately it wasn't, however it was this attribute that ultimately resolved the issue and led me to the resolution.

It appears since Jaap's post further logic and evolution has occured in the service, and these previous on-premises Lync enabled users could not be enabled for Skype for Business Online anymore using the above solution.

What I had to do was actually set the msRTCSIP-DeploymentLocator attribute to 'sipfed.online.lync.com' - once this was done the user would provision. Interesting as no previous Lync Hybrid deployment was in-place or had been attempted. It appears to be logic in the service for users that were previously enabled for Lync or Skype for Business on-premises.

Anyhow to cut a long story short, I wrote a little script to do this. I utilised a CSV file to import my users, as I didn't want to perform this operation across all user objects in the Active Directory. Similarly if you are planning to perform a cutover from on-premises Lync or Skype for Business rather than a Hybrid deployment and migration - again this will come in handy before you deprovision the users in the on-premises service. Just make sure you export the list of users via Get-CsUser first. Of course if you do plan on wanting to write across all user objects then substitute the first line "$users =" with Get-AdUser or similar rather than Import-CSV.

It's fairly self explanatory - And remember, even if you don't plan on using Skype for Business - be aware that Microsoft Teams still has some reliance on the service for services such as voice. So you will want to ensure there's no issues to provide your tenant and users a smooth Teams experience.

$users = Import-CSV -Path C:\yourfilehere.CSV
ForEach ($user in $users){
$u = $User.samaccountname -replace '"',''
Set-ADuser -Identity $u -Replace @{'msRTCSIP-DeploymentLocator' =  "sipfed.online.lync.com"}}


Friday, 16 January 2015

Invoking Pool failover when one Pool is the CMS

There are a lot of articles talking about Lync Front End Pool failover on the internet. Some are Technet articles relating to Standard Edition Servers like this one. Whilst others talk about the concept.

I wanted to go through a very real world scenario that I did this week, with it coming up with a few real world experiences I wanted to share with you.

So let's take a look at the scenario:


The topology is as follows:

1. There is a Front End Pool hosting the CMS in Site 1
2. There is a Front End Pool in Site 2
3. The Front End Pools are Backup Registrars for each other
4. The Edge Pool in each site has the retrospective Front End Pool in the same site as its next Hop
5. Access Edge for external users in Site 1 is: access.exchange2010.com
6. Access Edge for external users in Site 2 is: access2.exchange2010.com
7. Both Front End Pools have their own Backend SQL databases in the site the Front End Pool is in, we are not stretching any SQL services over sites.


First things first, before failover over the Pool to the Backup Registrar there's other things to consider.

So how do we make the user that is currently connecting to access.exchange2010.com connect to the other Access Edge? In normal circumstances you don't have to worry about this as hopefully things won't break, but I found for the Lync client to successfully connect to a secondary Access Edge FQDN I had to ensure the second record was in public DNS with a different weight to the primary, or preferred Access Edge FQDN. Then in the event all your Edge servers were down, inaccessible, or failed it would automatically connect to the other Access Edge.

Example:


And utilizing the Weight:


If you didn't want to do this then simple updating your _sip records to point to an alternative Access Edge would be absolutely sufficient, or manually updating each client (not fun) to the alternative FQDN.


Now we've got that out of the way, let's look at invoking Pool failover when one Front End Pool is the CMS!


1. First of all confirm Replication is fine using Get-CsManagementStoreReplicationStatus, there's absolutely no point performing this failover if replication is broken (unless you are in a real DR scenario!)


2. If at this point we try to fail over the Pool in Site 1 that is the CMS, we will get a failure saying it is the CMS and the CMS must be moved, so let's do that. We simply use the command Invoke-CsManagementServerFailover, as the pools are paired this command will know to move the CMS over to the Backup Registrar, which is the Front End Pool in Site 2. Select Y to confirm the move.


3. Once the CMS is failed over we now need to perform another task before we can invoke a pool failover, we need to move the Edge Pool dependency. We do this using the Set-CsEdgeServer command (we can also use the Topology Builder, but the management shell is far simpler here, and in DR scenarios we may be stating away from publishing topologies until we are in a semi working state).

What we are doing here is removing the association of the Edge Pool in Site 1 with the Front End Pool in Site 1, and now binding it to the Front End Pool in Site 2.


4. We are now in the position to fail the pool over using the Invoke-CsPoolFailover command. This is simply run as 'Invoke-CsPoolFailover –PoolFQDN "Site 1 Front End Pool FQDN"'. If this is an actual disaster then we can also add the –DisasterMode switch, but if the pool is up and working there's no need to add this.


That's it, you'll find all users will switch over to using the other pool. Moving the users back is just a case of running 'Invoke-CsPoolFailBack –PoolFQDN "Site 1 Front End Pool FQDN"' – and don't forget to move the CMS back if you so desire!


Oliver Moazzezi - MVP Exchange Server


Wednesday, 12 November 2014

Lync Room System won't show the Exchange Calendar


Recently I ran into an issue that is specific to certain hosting scenarios (Office 365 or other), or in some circumstances on-prem environments also for Lync Room Systems (LRS).

An LRS system cannot connect to a Lync environment if the top level domain of the LRS account, for example, LRS@domain.com is not present in the SSL cert on either the Edge, for external connectivity, or the Director or Front End Pool for LRS systems deployed internally.

In nearly all scenarios you will ensure your SIP domains are in your certificates, but some companies don't add all of them accepting functionality caveats, and for Lync Online and Lync Hosting Pack v2 you simply cannot add all tenants domains to certificates, so redirection of tenants domains to a hosting access edge is inevitable.

Taking a look at the SMART LRS setup documentation (as I had a SMART system to setup!) here you can see on page 72 that it is necessary to modify the registry with a TrustModelData key to allow LRS to connect to a Lync deployment where indeed the top level domain (TLD) for the LRS account is not in the cert.


If this key is not added the LRS system sits on a blank screen, whilst the certificate warning is hidden behind the LRS walled garden, never allowing you to go any further. What certificate warning you say? Well one like this:


Adding the key and restarting the LRS system tells LRS that the TLD from the certificate, even though it does not match the TLD for the LRS account, is trusted and this certificate warning does not appear. Therefore the LRS can start successfully and can log into Lync via the LRS console without issue. (If you are wondering how to get the registry up on LRS, check the screenshot from the SMART documentation I have pasted above, this is the same procedure for all LRS systems).


But what I found once LRS was rebooted was that the Exchange Calendar would not load.


I checked that the LRS system could actually contact the autodiscover service by manually authenticating directly on the LRS system against EWS (Exchange Web Services) with the LRS account in question.


I was stumped. A quick PSS call confirmed there's an LRS bug, and that you have to give 'Everyone' 'Full Control' on the HKLM\Software\Microsoft\Office\15.0\Lync registry entry to get the Exchange calendar to show..


Once this was applied and the LRS rebooted the Exchange Calendar still wouldn't show, so I went to verify that I had indeed set the permission correctly. It was during this time that I noticed another TrustModelData key – prepopulated with Lync Online – but more specifically Exchange Online TLDs:


So I added the hosted Exchange TLD (in my instance the Lync Edge TLD and Exchange TLD matched) of the certificate to this key and restarted LRS.

When LRS restarted I again received the dreaded loading symbol for approximately 20 seconds, before the calendar showed in full glory!


Conclusion

This isn't going to affect all customers that deploy LRS systems, if you included all SIP domains in all certificates (Edge and internal) this isn't going to affect you. But this will affect Office 365 LRS deployments and any customers that use multi tenant Hosted Lync and Hosted Exchange deployments.

For Office365 customers it appears all  TrustModelData registry entries have been pre-populated through the LRS update program (ensure you are up to the latest LRS update, I was), however you will have to perform the permission change to allow everyone full control for it to work.

For other hosted environments you will have to ensure the TLD is added to the TrustedModelData key as well as performing the permission change to allow everyone full control.

LRS should then login and also show the associated Exchange calendar just fine.

On a side note I'll post the full end to end deployment and configuration steps for Exchange 2013 hosting guidance and Lync Hosting Pack v2 in the coming days. Watch this space!

Take care

Oliver Moazzezi - MVP Exchange Server


Friday, 30 May 2014

A phone number has not been configured for you. Please contact your support team with this information.

01/07/2014 #UPDATE!

I recieved some great information from a few Lync MVP friends. We can override this error when the user does not have Enterprise Voice just by assigning a LineURI. This means you will have to synchronise the LineURI with their AD telephone number to ensure the validity of the data. There are two great blog posts that provide scripts to do this.

1. Lync MCM Shawn KirkPatrick
2. Another great one on Next Hop

You may have to modify them to suit your needs, and it is a bit of an inconvience to have to do this, but at least there's another solution to get around the problem for now.

#UPDATE END

 Lync provides dial in conferencing capabilities and allows the organisers of conferences to dial in to their meeting over the PSTN – supported with a pin code to authorise themselves as the presenter of the meetings.

This is a great feature but currently it appears there are some limitations when setting your pin through Lync web services - namely through https://dialin.yourdomain.com/dialin

If you are a Lync user that is assigned to a conferencing policy that supports dial in conferencing, but you are not an Enterprise Voice user with a LineURI, you cannot set your pin.


Here I am as a conferencing enabled user without Enterprise Voice – after signing into dialin I get:


If I log in as an Enterprise Voice enabled using with a LineURI (a phone number in E164 format) I can successfully set my pin:


If I am an Enterprise Voice user that does not have a LineURI – meaning within Lync I can make outbound calls only, I get the same issue as a conferencing only enabled user:


There appears to be no solution for this at present. This behaviour is in Lync 2010 and Lync 2013, both the Standard and Enterprise versions of the product as well as the Hosting Pack variants (LHPv1 and LHPv2) up to the present available CU updates.

The solution is to set the users pin through Powershell – which works and sets the user a pin successfully, however this is less than ideal as the helpdesk or admin that has just performed the powershell task now knows the users pin – a potential security breach.

To fix this issue you must use the Set-CsClientPin powershell cmdlet.

Use "Set-CsClientPin –Identity user1@somedomain.com" to create an auto assigned pin – which will be displayed to you in the PS window.


Alternatively use "Set-CsClientPin –Identity user1@somedomain.com –Pin 12345" to assign a pin of "12345" to the user.


I myself consider this 'feature' to be a bug – as you don't need enterprise voice capability to have a conferencing policy assigned to you that allows dial in conferencing – meaning you need your pin! 

And it has been raised to Microsoft for assessment as such.


Oliver Moazzezi - MVP Exchange Server


Friday, 25 April 2014

Lync Hosting Pack version 2 now officially supports Lync 2013 CU4

Great news to all LHPv2 hosters, Microsoft have confirmed with me that Lync 2013 CU4 is now officially supported for Lync 2013 LHPv2.

There appears to be no official page up yet on the announcement, and it is possible they may never be, but I have confirmed it is now supported by Microsoft and I am including their test upgrade document.

Grab CU4 here  and finally approve it for your WSUS patching teams without fear or rebuilding an entire LHPv2 platform :-)

Grab the CU4 test document here.


Enjoy!


Oliver Moazzezi - MVP Exchange Server


Monday, 13 January 2014

Distribution Groups and Lync 2013 LHPv2 - Part 3

Please see here for Part 1, and here for Part 2

The final part of Distribution Groups and Lync 2013 LHPv2!

This part automates the SQL clean up with the use of the SQL Stored Procedure 'rtcDeleteABEntry'.

In Part 1 we used the SQL T statement to delete the offending ObjectGUID from the rtcab database as can be seen here:


This is great for a single or a very small number of deletions but not so great if you have many ObjectGUIDs that need to be deleted for a Tenant.


The following script will automate this for you. Please be aware you need to export the ObjectGUIDs to a CSV, which was covered in Part 2.


#Distribution Groups and Lync 2013 LHPv2 – Bulk SQL deletion
# www.exchange2010.com  Oliver Moazzezi 2014
# SQL automation help gratefully received from James Sperring http://blog.sperring.me – thanks!

$SqlConnection = New-Object System.Data.SqlClient.SqlConnection
$SqlConnection.ConnectionString = "Server=.;Database=rtcab;Integrated Security=True"

$guids = Import-Csv C:\test.csv
$spName = "RtcDeleteAbEntry"
$paramName = "@_AdObjectGuid"

foreach ($g in $guids.Guid) {
  Write-Host "Executing $spName for $g"

  $guid = [guid]$g

  $SqlCmd = New-Object System.Data.SqlClient.SqlCommand
  $SqlCmd.CommandType = [System.Data.CommandType]::StoredProcedure
  $SqlCmd.CommandText = $spName
  $SqlCmd.Connection = $SqlConnection
  $parameter = $SqlCmd.Parameters.Add("@_AdObjectGuid", [System.Data.SqlDbType]::UniqueIdentifier)
  $parameter.Value = $guid

  $SqlAdapter = New-Object System.Data.SqlClient.SqlDataAdapter
  $SqlAdapter.SelectCommand = $SqlCmd
  $DataSet = New-Object System.Data.DataSet
  $SqlAdapter.Fill($DataSet)
  $SqlConnection.Close()
}

Write-Host "All Tenants GUIDs have been removed from the rtcab database. Remember to run Update-CsAddressBook" -foregroundcolor red -backgroundcolor yellow


Ensure to save locally as a PS1 script.

Ensure you update "$guids = Import-Csv C:\test.csv" to be the location of your CSV file, otherwise simply rename it to test.csv at the root of C:\.

Also note that the line "$SqlConnection.ConnectionString = "Server=.;Database=rtcab;Integrated Security=True" points to the local SQL server, as I have used "." – change this to the Server name that is hosting the SQL rtcab database if you aren't running this locally!

Once it has ran in Powershell you will see the following output:


Note that each 0 is the output from the SQL stored procedure saying that command completed successfully.

And finally after this has completed ensure that you run Update-CsAddressBook !

Enjoy!

Oliver Moazzezi - MVP Exchange Server


Friday, 10 January 2014

Distribution Groups and Lync 2013 LHPv2 - Part 2


Yesterday I posted Part 1 of this blog here, so thought it prudent to get Part 2 out of the door as soon as possible.


Part 1 showed how to make existing mail enabled Distribution Groups show within the Lync client for Lync 2013 LHPv2 tenants. This part will show how to bulk prep all Distribution Groups for a tenant in Active Directory, ready for removal from SQL via the rtcDeleteAbEntry Stored Procedure

1. Import-Module ActiveDirectory


This will loads up the Active Directory shell

2. We now need to take the ObjectGUID of the tenants OU and append this to the msRTCsip-groupingID and msRTCSip-tenantID of each Distribution Group. Yesterday this was a manual process against a single Distribution Group to show you how it worked. Today we'll script it within Powershell so you can update all Distributions groups for a tenant.

Take the distinguishedName of the tenants OU (I am using the same tenant as I did for Part 1). Run in the Exchange Management Shell:

$OU = " OU=TestLyncPlan2013,OU=Provider,OU=Hosting,DC=hslab2,DC=net "

$OUObject = Get-ADOrganizationalUnit -Identity $OU

$GUID = $OUObject.ObjectGUID


What this is essentially doing is binding the Organizational Units distinguishedName to $GUID


3. If you want we can then do a quick count of the Distribution Groups in the tenants OU.

(Get-AdGroup -SearchBase $OU -filter *).count


4. We will now bulk set the missing msRTCSIP-GroupingID onto all the Distributions Groups above.

Get-AdGroup -SearchBase  $OU -filter * -Properties msRTCsip-groupingID |set-adgroup -Replace @{'msrtcsip-groupingid'=$GUID}


This is taking the Distribution Groups via the Get-AdGroup cmdlet and getting the property msRTCsip-groupingID. From there we are telling it to replace the value it finds with $GUID using Set-AdGroup

5. Let's now do the same again for the msRTCsip-TenantID:

Get-AdGroup -SearchBase  $OU -filter * -Properties msRTCsip-TenantID |set-adgroup -Replace @{'msrtcsip-tenantid'=$GUID}


6. That's it all done!


We can turn this into a Powershell script. This would look like the following (copy it and add it to a PS1 file locally):

# Lync 2013 LHPv2 Distribution Group bulk set for msRTCsip-GroupingID and msRTCsip-TenantID
# www.exchange2010.com Oliver Moazzezi 2014

$OU = "Enter tenants DistinguishedName for OU here"

$OUObject = Get-ADOrganizationalUnit -Identity $OU

$GUID = $OUObject.ObjectGUID

Write-Host The total number of Distributions Groups for the Tenant are:
(Get-AdGroup -SearchBase $OU –filter * -Properties msRTCsip-groupingID).count

#We will now set the msRTCSIP-GroupingID

Get-AdGroup -SearchBase $OU -filter * -Properties msRTCsip-groupingID |set-adgroup -Replace @{'msrtcsip-groupingid'=$GUID}

#We will now set the msRTCSIP-TenantID:

Get-AdGroup -SearchBase $OU -filter * -Properties msRTCsip-TenantID |set-adgroup -Replace @{'msrtcsip-Tenantid'=$GUID}

Write-Host Distributions Group attributes completed successfully -foreground yellow


So now all the tenants Distribution Groups have the correct multi tenant attributes set. You can now export all their ObjectGUIDs as covered in Part 1, and begin the task of deleting them via the rtcDeleteAbEntry SQL Stored Procedure.

Part 3 will cover bulk automating this!


Take care

Oliver Moazzezi - MVP Exchange Server


Thursday, 9 January 2014

Distribution Groups and Lync 2013 LHPv2 - Part 1


The Lync 2013 LHPv2 official documentation goes into some detail about setting users for Tenant creation – however it does not state what to do for Distribution Groups – further it doesn't state how to make Mail enabled Distribution Groups work within the Lync client if a tenant already has Exchange, and enables Lync as a add-on later. Which is especially relevant seeing Lync 2013 LHPv2 has come to market later than Exchange 2013.

Because no documentation or blog exists flat out ANYWHERE on the Internet for this, I thought it a worthy addition to my 2014 blogs!

I also want to state this is Part 1 of a 3 part overview of Distribution Groups in LHPv2.

This part, Part 1, will cover the entire end to end process for making Distribution Groups show up, expand and work in the Lync client for an LHPv2 tenant.

Part 2 – this will cover automating the steps required in Active Directory on a per tenant basis

Part 3 – this will cover automating the steps required in SQL Server on a per tenant basis.

As you can see by Part 3 both the technical detail and automated procedures should be in place to help with this process once and for all. Which is great if you have a tenant with 300 Distributions Groups!

Firstly, for anyone looking for the official Lync 2013 LHPv2 documentation it is here: http://www.microsoft.com/en-us/download/details.aspx?id=39101

I recommend reading it. Please also be aware it is sensible to have a sound understanding of Lync, Active Directory and SQL to really get the best of this break down. A sound understanding of LHPv2 (Again! Read the official documentation in the download link above!) is also a wise investment – take some time to read the documentation if you haven't already, prior to proceeding.

Finally:

THESE STEPS ASSUME THE TENANT ALREADY HAS EXCHANGE AND HAS ENABLED LYNC AFTER. 

Please see the end of this post if this is vanilla Distribution Group creation.


1. Ensure you have added the msRTCsipTenantID and msRTCsipGroupingID attributes to the required distribution group. Copy them from a user within the tenant that is already created, or via the ObjectGUID of the tenants OU itself.


2. It is a good idea to wait for AD replication to occur – especially if you are multi site and do not have change based notification enabled. Go grab a cup of coffee.


3. Grab the distinguishedName from the Tenants OU in Active Directory:


4. From the Exchange Management Shell run the following including the Tenants OU distinguishedName from the previous step:

Get-DistributionGroup -OrganizationalUnit "distinguishedName here"
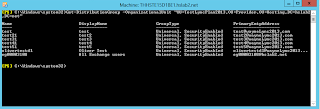


5. As we can successfully retrieve the Tenants distribution groups back, we will now export this data:

Get-DistributionGroup -OrganizationalUnit "distinguishedName here" |select guid |export-csv c:\GUIDExport.csv

This will export all valid ObjectGUIDs of each Distribution Group to CSV:


6. We now need to open SQL Management Studio on the SQL server that is hosting the rtcab database for address book query data. If you have a SQL mirror you can use the following command to work out which is the Principle and which is the Mirror:

Get-CsDatabaseMirrorState -PoolFqdn "Your Front End Pool FQDN holding the CMS"

7. Once in SQL Management Studio, search under 'rtcab' for the 'RtcDeleteAbEntry' Stored Procedure


8. Take the first GUID from your exported CSV and create a new Query. Run the following:

exec [dbo].[RtcDeleteAbEntry] 'Enter GUID here'


9. Finally Execute your SP. You will see the command completes successfully:


10. Repeat this for the remaining GUIDs you have.

11. Finally, open the Lync Management Shell and run:

Update-CsAddressBook

This will then start the process of trawling Active Directory and picking up these deleted Distribution Groups, and adding them back in with the correct multi tenant attributes.


12. Once the above process has completed you should see the Distribution Group now working for your Tenant. This can take anything from 15 minutes to an hour or so depending on the size of your deployment.  Enjoy!
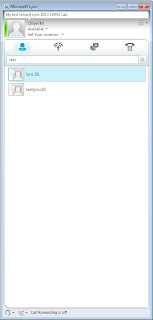

So that is the entire end to end process to fix broken Distribution Groups in Lync 2013 LHPv2.

I did say I would cover vanilla DL creation as a lot less work is required. These are the steps.


1. Create your Distributions Groups – ensure they are NOT mail enabled at this point in time. This is very important, otherwise the Lync address book service will pick them up and add them to the rtcab database.

2. Ensure you have added the msRTCsipTenantID and msRTCsipGroupingID attributes to the required distribution group. Copy them from a user within the tenant that is already created, or via the ObjectGUID of the tenants OU itself.

3. You are now free to mail enable them for Exchange use, wait for AD replication to occur from the previous step before doing this.

4. Once the address book service has run, it will automatically add them to the tenant without anymore work. If you want to speed this process up, change the times your address book service runs (default is once every 24 hours), or invoke Update-CsAddressBook at your leisure. If you want to check the schedule, invoke Get-CsAddressbookConfiguration.


So that's it, how to get Distribution Groups working in Lync 2013 LHPv2 in it's entirety. If at this point you are still having issues, there's two things to check:

The first: Ensure you are testing as an external user! Hit the external web services and not internal. I had issues with Internal Web Services, which is no surprise as LHPv2 has no concept of internal users.

The Second: Ensure Group Expansion is enabled. You can check this using Get-CsWebServiceConfiguration:


If it isn't you can set it to True using the following command: Set-CsWebServiceConfiguration –EnableGroupExpansion $true


Parts 2 and 3 will follow later this week.

Take care,

Oliver Moazzezi - MVP Exchange Server


Friday, 13 September 2013

Lync 2013 LHPv2 Dialin Simple Url rewrite issue

Greetings people

As per the documentation here we can provision tenant Simple Meet URLs by the addition of the tenants SIP domains appended on to the Hosters primary SIP one.


The LHP code supports the provisioning of Tenant meet simple urls by performing the following:


You can see this in the LHP deployment guide.

However it doesn't support the same method for the dialin simple url.

This appears to follow the previous guidance when performing multi-tenancy with Lync 2010 Enterprise.

However if you put in the dialin url as for example https://dialin.hostedprovidersSIPdomain.com and publish the topology (this is the default behaviour!), at no point is an IIS url rewrite rule created to forward the domain to

(Note that the code appears to still provide references to the BETA of Lync Online, this obviously wasn't cleared up for the RTM release)

LHP code doesn't add the rule in. Here's my screenshot from IIS, my Lab is under hslab2.net:


You can clear see the re-write rules for the Meet url. There's not one ever written for Dialin.

So how can we work around this issue?

What I have done to work around this is to publish the Dialin simple url in the topology builder as https://dialin.hostedprovidersSIPdomain.com/dialin

See here:


This then works around the problem, and all Lync tenants will have https://dialin.hostedprovidersSIPdomain.com/dialin as their phone access url when creating a Lync online meeting in Outlook.

Be sure once you make this change (or any other for a Simple URL) you run Enable-CsComputer on your Lync Front Ends and Directors if you are using them.

I have raised this to Microsoft and I am in the middle of pushing this as a bug, and I hope they will update their documentation in the mean time to be more specific around the Dialin simple URL.

 I will have more articles available on Microsoft Lync 2013 LHPv2 soon.

Take care people,

Oliver Moazzezi - MVP Exchange Server


Grab the Lync 2013 LHPv2 deployment documentation from Microsoft


Microsoft have release the Lync Hosting Pack version 2, based on Microsoft Lync 2013. It is formally known as Lync 2013 LHPv2.

Grab the deployment guide here

Oliver Moazzezi - MVP Exchange Server


Wednesday, 17 April 2013

Customizing Role Assignment Policies for multi-tenants in Exchange Server 2013: Gal Pictures

When dealing with multi-tenants in Exchange Server 2013 (RTM and CU1) with a Hosting Control Panel that can only feed data into Exchange, rather than taking data back out of it to back-fill the Portal we have to lock down certain elements to only allow a customer to edit certain aspects via their desginated Panel Provider.
 
Take Exchange 2013, by default in most multi-tenant Hosting Orgs “MyContactInformation”, “MyPersonalInformation”, “MyMobileInformation” and “MyAddressInformation” and disabled, only allowing a tenant to configure this from the Hosting Control Panel.
 
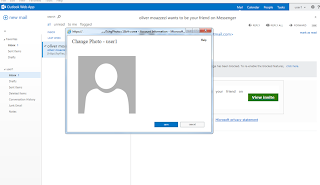
The biggest issue this presents is that this means a user cannot change their Photo within OWA, as this is locked into “MyContactInformation”
 
 
1. A user cannot change their picture and thus it is empty, giving an unfulling experience in Outlook, OWA and Lync.


2. The logged in user can’t change their picture
 
 
3. Additionally other information is locked down also


So if we log into the EAC we can see this is because the Default Role Assignment Policy has “MyContactInformation”, “MyPersonalInformation”, “MyMobileInformation” and “MyAddressInformation” disabled. Standard practice in nearly all Enterprise Hosting environments.


So how can we keep this aspect locked down, allowing co-existence with a Control Panel but allowing tenants to actually upload pictures to get a more fulfilling experience?
 
Let takes a look at the Management Roles in question in PowerShell. We can do this simply by using “Get-ManagementRole”
 
 
So we can see above that “MyContactInformation” owns “Set-UserPhoto”, “Remove-UserPhoto” and “Get-UserPhoto”. We can take this built in Management Role and create a custom one from it, to allow pictures to be uploaded and used.
 
 
Let’s create a new Management Role using “New-ManagementRole”. We’ll call it “Oliver Test” and create it from the parent “MyContactInformation”


Now if I view this new Management Role I can see it has all the cmdlets from the parent.


I can now start to customise it by removing certain cmdlet elements. You can see I am using “Get-MangementRoleEntry”, specifing the cmdlet I do not want, and then removing it with “Remove-ManagementRoleEntry”
 
 
Once I have cleaned up my Management Role “Oliver Test”, let’s look at what I have left. You can see I now have just the cmdlets needed to allow photos to be uploaded and removed and edited if desired.
 
 
Logging back into the EAC I can now see this new Management Role under the Default Role Assignment Policy. I check it to enable it.
 
 
Logging back into my tenant user I am now able to change my photo, allowing picture integration into Outlook, OWA and Lync.


Checking the rest of my details you can see as before I cannot edit them, keeping the unity of your Hosting Control Panel which should control these settings.


Finally let’s log into OWA and Lync and see the new experience!


I hope this helps Hosters to integrate pictures into Exchange 2013 Enterprise. I will look to push a new blog out in a few weeks for managing different Role Assignments Policies per tenant in Exchange 2013 Enterprise.
 
Have a great week!
 

Take care!
 
Oliver Moazzezi - MVP Exchange Server