Showing posts with label Exchange. Show all posts

Thursday, 22 September 2016

Validating email addresses for Exchange recipients before migrating to Exchange Online

*UPDATE*
This is now set to 400 from 200 as per this Microsoft article here. I've updated accordingly.
-------------------------------------------------------------------------------------------------------------

Recently Exchange Online has added a limit to the number of proxy addresses (email addresses) an object can have (mail enabled user or mailbox for example) in Exchange Online.


This has gone from a seemingly unlimited number to "400".


This poses a problem for any migrations, Hybrid or otherwise, where an on-premises mailbox has more than 200 email addresses assigned to it.


Microsoft has published this limiting change, although buried, here.


So before migrating to Exchange Online it may be wise to check for any recipients that have more than 200 email addresses; you can then resolve the issue and have a better migration experience.


To check:


Get-Recipient | Where {($_.EmailAddresses).count -gt 400}


In the example below I have used 'Get-Mailbox', but this is only to limit the number of returns for this blog post example. The first shows the command, the second shows the command bringing back any mailboxes with email addresses of more than 10, and finally in the third I am getting the all clear as none have over 200.


If you have over 1000 objects don't forget -ResultSize!

Get-Recipient -ResultSize unlimited | Where {($_.EmailAddresses).count -gt 400}


Have a great week!

Oliver Moazzezi
Twitter: @Olivermoazzezi


Friday, 9 October 2015

Apply Activesync Policies to Exchange Online Mailboxes synchronisation script

A few months back I published details of my On-Premise Activesync Mailbox Policy to Exchange Online synchronisation script (it's also available to download in the Technet Gallery).

This allowed you to simply and easily copy your existing Activesync policies to your Exchange Online tenant in Office 365 rather than having to setup them up again. This was always very useful in a perpetual Hybrid environment where co-existence may be ultimately permanent, or indeed if you're just simply migrating all users and removing your Exchange on premise presence.

I am pleased to announce the next release today, ApplyEASMailboxPolicy2EXO.ps1.

This script will take your on premise users Activesync Mailbox Policy that is assigned to them, and then apply the policy once the user has been moved in a Cutover, Staged, Hybrid or third party migration to Exchange Online.

It will also check to see if the user actually has Activesync enabled, if the user is disabled, it will disable it for their Exchange Online mailbox also.

This simplifies mobile device access in a Mobile First, Cloud First Office 365 engagement.


If you are performing a 'Cutover' migration, either natively or using third party tools (you are moving all mailboxes to Exchange Online at once) simply run the script. If this is more than 1000 users you can specify a higher setting with the –ResultSize switch parameter.

If you are performing a 'Staged' migration, or moving select mailboxes in a Hybrid state or indeed select mailboxes with a third party, then you can pipe a csv file with the users that have moved using the –Staged switch parameter.

I'll run you through both scenarios.


Cutover

So first of all let's look at the Activesync Mailbox Policy applied to the users on premise. We can see that each user has a specific policy and that infact 'New User 3' has Activesync disabled.

Let's look in Exchange Online as we have just performed a Cutover Migration – all users should have the Default policy applied and be enabled for Activesync.

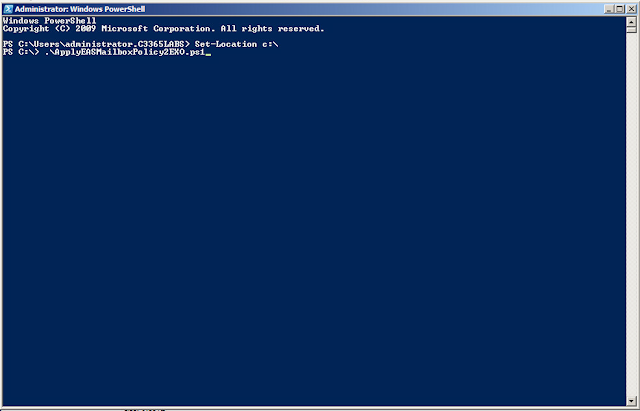
Ok so let's start running the script. We have already created the Activesync Mailbox Policies using my previous script here Open a PS window and run the PS1 script.


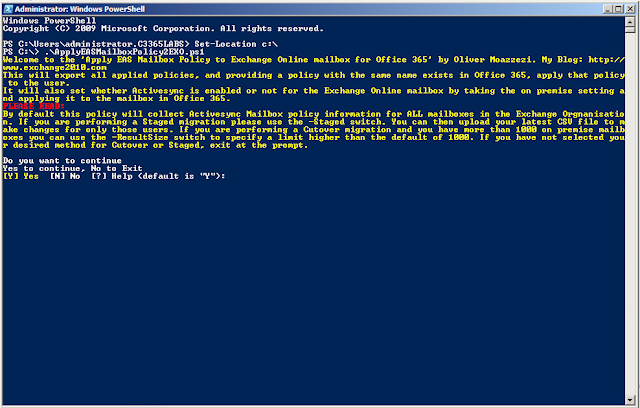
The accompanying text will explain the switches to you. As this is a Cutover (you have moved all users at once) we simply press Y to proceed.


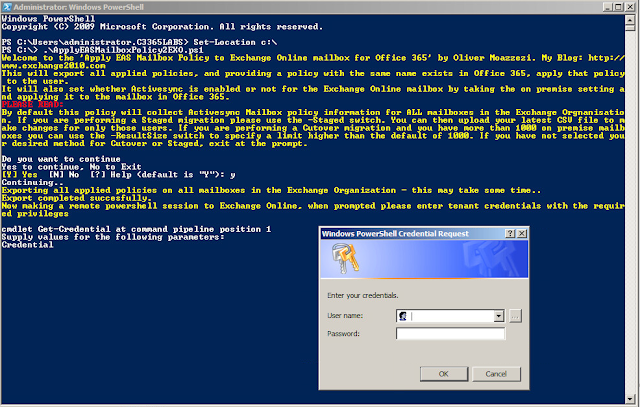
It will now do two things. The first thing it will do is gather which Activesync Policy is applied to your on premise users. It will collate the information into a locally saved CSV file that will be created in the same location the PS1 file is run from.
Once this has been collected it will then ask for your Office 365 tenants admin credentials. Enter an account that has the necessary Exchange permissions.


It will then import the configuration file, inform you of the total number of mailboxes to configure, and start configuring your Exchange Online mailboxes.
Once it has completed, it will inform you and then disconnect your Exchange Online PS session.

It will then inform you that you can then close the PS window.

So let's look at them in Exchange Online. Has the change been implemented? You bet!


Staged

So what happens if you aren't moving all mailboxes at once? For example a staged migration? Well you can input a CSV of the mailboxes you have moved into the script. Let's take a look.
Run the script with the –Staged parameter and specify your CSV.

Specify Yes to continue.

You will this time be asked for your Staged migration CSV file.

Enter your CSV path, note that you can enter multiples if you so wish, to finish simply press Enter without adding another CSV.

Once it has informed you it has ingested the CSV file it will then make a connection to Exchange Online. Enter your tenant admin credentials with relevant Exchange Online permissions.

It will now make the connection to Exchange Online and perform the necessary changes on those specific mailboxes. Note that this time it says there's only 2 mailboxes to change. That is because only 2 mailboxes were in my staged CSV file.


And that's it! All done!


You can download the script from Technet Gallery.

It has been tested with Exchange 2007, 2010, 2013 and 2016.


Enjoy and take care,

Oliver Moazzezi – MVP Exchange Server
Twitter: @Olivermoazzezi


Monday, 1 June 2015

ActiveSync Mailbox Policy to Exchange Online synchronisation script


When moving to Office 365 you haven't just got the mailbox data to worry about, but also a variety of other issues like ensuring your on premise configuration and policies are understood and carried over to Exchange Online.
In a Cutover, Staged, Hybrid or third party migration you may want to prep many policies prior to moving the first mailbox to Office 365.
One of the policies you may want to configure prior to moving the first mailbox is Activesync Mailbox Policies. If you have many policies, auditing them and then creating them in Office 365 can be a time consuming task. Luckily I have written a script to help with this.
The script will do the following actions:
Check to see if any of your policies has a null field for the password device length. This should be between 1 and 16. If any are indeed null the script will inform you the policies that are at fault and halt
Export all of your Activesync Mailbox policies (including your default policy if you include –ModifyDefaultPolicy) – it will create local files from where the ps1 file is run from
Connect to Exchange Online in the powershell session (it will prompt for username and password)
Create all Activesync Mailbox policies with the on premises names and configuration settings
Clean up any local files it created when performing the export process
Disconnect any powershell sessions it has open
Inform you the process has completed successfully.
The script works well, but it is designed to be used prior to moving the first mailboxes, not that it will cause an issue if it is ran later than that of course, but because an Administrator may have already started to make changes or even set up policies using the same names as the on premise ones.
If you do run into this condition it will simply fail on creating that policy, similarly if you run the script again it will complete successfully but will fail on creating new policies as they are already created.
If you have decided to include the –ModifyDefaultPolicy switch it will also gather your default policy settings and then export them and configure the existing Office 365 default policy with the settings it has exported.
Let's take a look at it in action. Logging onto my new Office 365 tenant I can see I just have the default policy with default out of the box settings:


If I look at my on premise configuration you can see I have multiple Activesync Mailbox policies in use:


Each policy has different configuration settings. You can see in the Office 365 EAC my default policy is set with default settings and doesn't require a password. However my on premise default policy does with a minimum password length of 6 characters:


I have opened a Powershell session and I will run .\ImportEASPolicies2EXO.ps1 –ModifyDefaultPolicy


It will first check to see if there are any policies with an incorrect, or null, password length and advise you of them:


Providing that is fine, it will continue and export the on premise policies before making a connection to Exchange Online. It will prompt for your tenant credentials:


Once connected it will start creating the policies, and modify the default policy if you selected to do this (like I am in my example):


Once completed you can close the window. It will disconnect any PS Sessions it has created and also clean up any files created during the process.


So let's take a look back in the Office 365 tenant EAC


You can see the policies have been created and the Default policy has been modified successfully.
Once the *-ActivesyncMailboxPolicy cmdlets no longer work I will update the script to a version 2 making use of *-MobileDeviceMailboxPolicy. But this won't be for some time.
Until that time using the older cmdlet makes things easier.
You can grab the script HERE.
Have fun!


Oliver Moazzezi – MVP Exchange Server
Twitter: @Olivermoazzezi


Tuesday, 20 January 2015

Installing an Office OWA app manifest file in Exchange 2013 (Part 2)

In Part 1 I went through installing an OWA manifest file either through the ECP, or via the Exchange Management Shell that wasn't part of the Office Store. In this part I wanted to cover how to push an App out to selected users as well as scripting deployment .

Restricting Apps to a Distribution Group via 'SpecificUsers'


1. Get the Distribution Group, and then in the Exchange Management Shell run the following

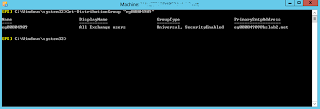
Get-DistributionGroup "Group Here"


2. Once you have confirmed the DL, run the following

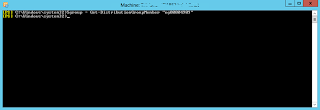
$group= Get-DistributionGroupMember "All Users Security Group Name"

Note we have changed the command to "Get-DistributionGroupMember"


3. To install the App to the the users in the DL run the following command

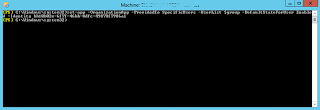
New-App –OrganizationApp –ProvidedTo SpecificUsers –userlist $group –DefaultStateForUser enabled –url "your manfiest XML file url here"

As mentioned in Part 1, if you want to force the app to be always enabled and disallow the users from disabling it you can set –DefaultStateForUser to –DefaultStateForUser AlwaysEnabled. Similarly if you want the app to be available but only enabled by the user you can set it to Disabled

Alternatively if you have the app already installed you can run:

Set-App –OrganizationApp –ProvidedTo SpecificUsers –UserList $group –DefaultStateForUser Enabled –Identity "App ID (GUID)"

This will change the state of the App to specific users and set it to enabled, again, modify –DefaultStateForUser as you so wish


4. Once the App has been set to Specific Users you can check it using the EAC:


5. You will find the Distribution Group members now have the app, and all other users do not. There are other ways of selecting users however, we could have for example performed

"Get-Mailbox –OrganizationalUnit "DistinguishedName of OU" instead of "Get-DistributionGroupMember"

Therefore we could use "$users = Get-Mailbox –OrganizationalUnit "DistinguishedName of OU"


Scripting via Powershell

So pushing an App out to specific users is great, but the delivery method doesn't take into effect new users joining the Distribution Group or Organizational Unit as well as users that are removed. For that we need to use a script. The below scripts can be used as a scheduled task, and will push the App out to the specific users required. One is for DL delivery and the other via OU. The only two I have so far needed.


#Install Office App to single Organizational unit

#SPECIFY OU DISTINGUISHEDNAME HERE
$users = Get-Mailbox -OrganizationalUnit "DistinguishedName of OU here"
$tenant = Get-OrganizationalUnit "DistinguishedName of OU here"
$tenantidentity = $tenant.name
$xmlmanifest = "URL to manfifest file"

#Start
Write-Host The total number of mailbox enabled users found for $tenantidentity is ($users).count -foreground yellow
New-App –OrganizationApp –ProvidedTo SpecificUsers –userlist $users –defaultstateforuser enabled –url $xmlmanifest
Write-Host Office App installation complete for $tenantidentity -foreground yellow


#Install Office App to for Distribution Group

#SPECIFY DISTRIBUTION GROUP HERE
$Group = Get-DistributionGroupMember "Security Group Name here"
$tenant = Get-DistributionGroup "Security Group Name here"
$tenantidentity = $tenant.name
$xmlmanifest = "URL to manfifest file"

#Start
Write-Host The total number of mailbox enabled users found for $tenantidentity is ($Group).count -foreground yellow
New-App –OrganizationApp –ProvidedTo SpecificUsers –userlist $Group –defaultstateforuser enabled –url $xmlmanifest
Write-Host Office App installation complete for $tenantidentity -foreground yellow


That's it for now, take care.

Oliver Moazzezi - MVP Exchange Server


Friday, 16 January 2015

Installing an Office App manifest file in Exchange 2013 (Part 1)

It's very easy installing an Office App into Exchange 2013, users have the capability themselves should you allow it, but what happens if you want to publish an App that isn't available in the Office Store? You may have created your own App or want to install a bespoke unpublished app from a trusted third party or partner company for example. Read on..


1. In the EAC browse to Organization | Apps


2. Select to install the App. You have the choice of 'Url' or 'file' as well as from the 'Office Store'


3. In this instance I am installing from URL, adding my URL to the file for the custom app I want to install


4. Once it is installed you will see it is disabled by default:


5. Edit the app to enable it:

And that's it! It's installed and available for everyone, but what if we want to push an app to specific users or push an app out via the Exchange Management Shell?

6. We can install the App via the Exchange Management Shell:

"New-App –OrganizationApp –Url "URL to Manfifest XML here"


7. Ensure the commands completes, it will show the DisplayName of the app, whether it is enabled and the App version number


8. If you use "Get-App" it will show all Apps, including the one you've just installed from your manifest file


9. However using "Get-App –identity "Bing Maps", for example will not specifically target an App.


10. Selecting "Get-App |select DisplayName, Identity" yields a mailbox and GUID based Identifier


11. You need the GUID to select the App. You have to use that against the –Identity parameter. 'Get-App –Identity "Domain/Mailbox/GUID"'


12. When logging in as a user in OWA, you will see your Apps, in this example, Bullhorn is available to enable


If you want to enable it via the Exchange Management Shell you can do this via the Set-App cmdlet.

"Set-App -Identity "App ID (The GUID)" -Enabled $true"


Similarly, if you wanted to push the Apps to users and not let them disable the App, we can again use  Set-App but this time using the -DefaultStateForUser parameter. If we specify -DefaultStateForUser AlwaysEnabled, the user will not be able to disable the App.

That's it for now, in Part 2 I will show you how to restrict the App to specific users as well as provide some scripts to automatically roll out Apps to new users as and when they join the company, ensuring your users are pushed the specific apps your company requires.

Oliver Moazzezi - MVP Exchange Server

Wednesday, 12 November 2014

Lync Room System won't show the Exchange Calendar


Recently I ran into an issue that is specific to certain hosting scenarios (Office 365 or other), or in some circumstances on-prem environments also for Lync Room Systems (LRS).

An LRS system cannot connect to a Lync environment if the top level domain of the LRS account, for example, LRS@domain.com is not present in the SSL cert on either the Edge, for external connectivity, or the Director or Front End Pool for LRS systems deployed internally.

In nearly all scenarios you will ensure your SIP domains are in your certificates, but some companies don't add all of them accepting functionality caveats, and for Lync Online and Lync Hosting Pack v2 you simply cannot add all tenants domains to certificates, so redirection of tenants domains to a hosting access edge is inevitable.

Taking a look at the SMART LRS setup documentation (as I had a SMART system to setup!) here you can see on page 72 that it is necessary to modify the registry with a TrustModelData key to allow LRS to connect to a Lync deployment where indeed the top level domain (TLD) for the LRS account is not in the cert.


If this key is not added the LRS system sits on a blank screen, whilst the certificate warning is hidden behind the LRS walled garden, never allowing you to go any further. What certificate warning you say? Well one like this:


Adding the key and restarting the LRS system tells LRS that the TLD from the certificate, even though it does not match the TLD for the LRS account, is trusted and this certificate warning does not appear. Therefore the LRS can start successfully and can log into Lync via the LRS console without issue. (If you are wondering how to get the registry up on LRS, check the screenshot from the SMART documentation I have pasted above, this is the same procedure for all LRS systems).


But what I found once LRS was rebooted was that the Exchange Calendar would not load.


I checked that the LRS system could actually contact the autodiscover service by manually authenticating directly on the LRS system against EWS (Exchange Web Services) with the LRS account in question.


I was stumped. A quick PSS call confirmed there's an LRS bug, and that you have to give 'Everyone' 'Full Control' on the HKLM\Software\Microsoft\Office\15.0\Lync registry entry to get the Exchange calendar to show..


Once this was applied and the LRS rebooted the Exchange Calendar still wouldn't show, so I went to verify that I had indeed set the permission correctly. It was during this time that I noticed another TrustModelData key – prepopulated with Lync Online – but more specifically Exchange Online TLDs:


So I added the hosted Exchange TLD (in my instance the Lync Edge TLD and Exchange TLD matched) of the certificate to this key and restarted LRS.

When LRS restarted I again received the dreaded loading symbol for approximately 20 seconds, before the calendar showed in full glory!


Conclusion

This isn't going to affect all customers that deploy LRS systems, if you included all SIP domains in all certificates (Edge and internal) this isn't going to affect you. But this will affect Office 365 LRS deployments and any customers that use multi tenant Hosted Lync and Hosted Exchange deployments.

For Office365 customers it appears all  TrustModelData registry entries have been pre-populated through the LRS update program (ensure you are up to the latest LRS update, I was), however you will have to perform the permission change to allow everyone full control for it to work.

For other hosted environments you will have to ensure the TLD is added to the TrustedModelData key as well as performing the permission change to allow everyone full control.

LRS should then login and also show the associated Exchange calendar just fine.

On a side note I'll post the full end to end deployment and configuration steps for Exchange 2013 hosting guidance and Lync Hosting Pack v2 in the coming days. Watch this space!

Take care

Oliver Moazzezi - MVP Exchange Server