Friday 30 January 2015

Microsoft Cloud Solution Provider Program

Microsoft launched the CSP at The Microsoft WorldWide Partner conference in 2014, but only now the fruits of Microsofts efforts are starting to be seen in Office365.

You have to qualify to be considered as a CPS partner, but qualification doesn't automatically mean acceptance yet – for the time being you must be accepted also.

There are currently 2 tiers to the CSP, outlined below.

1-Tier is the program of choice for partners looking to provide an end-to-end customer experience, including customer support. In this model, the partner has a direct relationship with Microsoft. This program requires partners to have high capability standards to provide a great customer experience.

2-Tier is designed for resellers to work with their 2-Tier distribution partners to sell Microsoft cloud services. In this program, the 2-Tier distribution partner provides reseller and customer support. Most partners will participate in the CSP program as a 2-Tier reseller


The biggest changes for a typical O365 reseller will be owning the entire billing cycle, and taking on the entirety of the support for your tenants, instead of the tenants raising issues to Microsoft directly. This means you are going to need, if you want to be successful and grow your O365 CSP tenant offering, a 24/7 support team – primarily delivered over the phone.

So what are Microsofts expectations of a Cloud Provider signed up to the CSP?

Own and control the billing
  •   Provide customers with one consolidated bill, monthly or annually
  •   Order from a wholesale price list, create unique offers, and set the price
  •   Create financing options, such as spreading upfront costs over the fiscal year

Sell integrated offers and services
  •   Introduce service offers across each stage of the customer lifecycle
  •   Include your tools, products, or services in one integrated sales motion
  •   Increase upsell opportunity with greater customer touch points

Provision, manage, and support
  •   Directly provision and manage your customers' tenant with in-product tools
  •   Address customer technical support issues as admin-on-behalf
  •   Drive customer satisfaction as the first point of contact

This is all interesting stuff, the Microsoft focus appears to rely on the expertise of Cloud Providers knitting together an O365 support model and customer experience without Microsoft having to take the hit in the support cycle – we all know the apparent burden of O365 support on Microsoft and that raising tickets as an O365 customer hasn't provided the best experience. It makes sense that Microsoft are looking to de-emphasise support and most likely at the same time increase their revenue from the service.

One of the other immediate apparent benefits is the power and focus of automation for many Cloud Providers – O365 is great – but currently all products and services are Microsoft – with an active Cloud Provider with good standing relationships with many vendors I can foresee customers being able to purchase their O365 services and actually selecting other services in the service wrap – all automated, setup and integrated and hybridised by the Cloud Provider – with a single unified bill to the customer – fantastic.

More information can be found here and here

Come back next week as we take an active look at the O365 Portal as a CSP enabled Partner. See you then!


Oliver Moazzezi - MVP Exchange Server


Tuesday 20 January 2015

Installing an Office OWA app manifest file in Exchange 2013 (Part 2)

In Part 1 I went through installing an OWA manifest file either through the ECP, or via the Exchange Management Shell that wasn't part of the Office Store. In this part I wanted to cover how to push an App out to selected users as well as scripting deployment .

Restricting Apps to a Distribution Group via 'SpecificUsers'


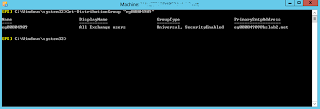
1. Get the Distribution Group, and then in the Exchange Management Shell run the following

Get-DistributionGroup "Group Here"


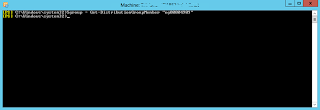
2. Once you have confirmed the DL, run the following

$group= Get-DistributionGroupMember "All Users Security Group Name"

Note we have changed the command to "Get-DistributionGroupMember"


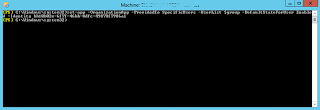
3. To install the App to the the users in the DL run the following command

New-App –OrganizationApp –ProvidedTo SpecificUsers –userlist $group –DefaultStateForUser enabled –url "your manfiest XML file url here"

As mentioned in Part 1, if you want to force the app to be always enabled and disallow the users from disabling it you can set –DefaultStateForUser to –DefaultStateForUser AlwaysEnabled. Similarly if you want the app to be available but only enabled by the user you can set it to Disabled

Alternatively if you have the app already installed you can run:

Set-App –OrganizationApp –ProvidedTo SpecificUsers –UserList $group –DefaultStateForUser Enabled –Identity "App ID (GUID)"

This will change the state of the App to specific users and set it to enabled, again, modify –DefaultStateForUser as you so wish


4. Once the App has been set to Specific Users you can check it using the EAC:


5. You will find the Distribution Group members now have the app, and all other users do not. There are other ways of selecting users however, we could have for example performed

"Get-Mailbox –OrganizationalUnit "DistinguishedName of OU" instead of "Get-DistributionGroupMember"

Therefore we could use "$users = Get-Mailbox –OrganizationalUnit "DistinguishedName of OU"


Scripting via Powershell

So pushing an App out to specific users is great, but the delivery method doesn't take into effect new users joining the Distribution Group or Organizational Unit as well as users that are removed. For that we need to use a script. The below scripts can be used as a scheduled task, and will push the App out to the specific users required. One is for DL delivery and the other via OU. The only two I have so far needed.


#Install Office App to single Organizational unit

#SPECIFY OU DISTINGUISHEDNAME HERE
$users = Get-Mailbox -OrganizationalUnit "DistinguishedName of OU here"
$tenant = Get-OrganizationalUnit "DistinguishedName of OU here"
$tenantidentity = $tenant.name
$xmlmanifest = "URL to manfifest file"

#Start
Write-Host The total number of mailbox enabled users found for $tenantidentity is ($users).count -foreground yellow
New-App –OrganizationApp –ProvidedTo SpecificUsers –userlist $users –defaultstateforuser enabled –url $xmlmanifest
Write-Host Office App installation complete for $tenantidentity -foreground yellow


#Install Office App to for Distribution Group

#SPECIFY DISTRIBUTION GROUP HERE
$Group = Get-DistributionGroupMember "Security Group Name here"
$tenant = Get-DistributionGroup "Security Group Name here"
$tenantidentity = $tenant.name
$xmlmanifest = "URL to manfifest file"

#Start
Write-Host The total number of mailbox enabled users found for $tenantidentity is ($Group).count -foreground yellow
New-App –OrganizationApp –ProvidedTo SpecificUsers –userlist $Group –defaultstateforuser enabled –url $xmlmanifest
Write-Host Office App installation complete for $tenantidentity -foreground yellow


That's it for now, take care.

Oliver Moazzezi - MVP Exchange Server


Friday 16 January 2015

Installing an Office App manifest file in Exchange 2013 (Part 1)

It's very easy installing an Office App into Exchange 2013, users have the capability themselves should you allow it, but what happens if you want to publish an App that isn't available in the Office Store? You may have created your own App or want to install a bespoke unpublished app from a trusted third party or partner company for example. Read on..


1. In the EAC browse to Organization | Apps


2. Select to install the App. You have the choice of 'Url' or 'file' as well as from the 'Office Store'


3. In this instance I am installing from URL, adding my URL to the file for the custom app I want to install


4. Once it is installed you will see it is disabled by default:


5. Edit the app to enable it:

And that's it! It's installed and available for everyone, but what if we want to push an app to specific users or push an app out via the Exchange Management Shell?

6. We can install the App via the Exchange Management Shell:

"New-App –OrganizationApp –Url "URL to Manfifest XML here"


7. Ensure the commands completes, it will show the DisplayName of the app, whether it is enabled and the App version number


8. If you use "Get-App" it will show all Apps, including the one you've just installed from your manifest file


9. However using "Get-App –identity "Bing Maps", for example will not specifically target an App.


10. Selecting "Get-App |select DisplayName, Identity" yields a mailbox and GUID based Identifier


11. You need the GUID to select the App. You have to use that against the –Identity parameter. 'Get-App –Identity "Domain/Mailbox/GUID"'


12. When logging in as a user in OWA, you will see your Apps, in this example, Bullhorn is available to enable


If you want to enable it via the Exchange Management Shell you can do this via the Set-App cmdlet.

"Set-App -Identity "App ID (The GUID)" -Enabled $true"


Similarly, if you wanted to push the Apps to users and not let them disable the App, we can again use  Set-App but this time using the -DefaultStateForUser parameter. If we specify -DefaultStateForUser AlwaysEnabled, the user will not be able to disable the App.

That's it for now, in Part 2 I will show you how to restrict the App to specific users as well as provide some scripts to automatically roll out Apps to new users as and when they join the company, ensuring your users are pushed the specific apps your company requires.

Oliver Moazzezi - MVP Exchange Server

Invoking Pool failover when one Pool is the CMS

There are a lot of articles talking about Lync Front End Pool failover on the internet. Some are Technet articles relating to Standard Edition Servers like this one. Whilst others talk about the concept.

I wanted to go through a very real world scenario that I did this week, with it coming up with a few real world experiences I wanted to share with you.

So let's take a look at the scenario:


The topology is as follows:

1. There is a Front End Pool hosting the CMS in Site 1
2. There is a Front End Pool in Site 2
3. The Front End Pools are Backup Registrars for each other
4. The Edge Pool in each site has the retrospective Front End Pool in the same site as its next Hop
5. Access Edge for external users in Site 1 is: access.exchange2010.com
6. Access Edge for external users in Site 2 is: access2.exchange2010.com
7. Both Front End Pools have their own Backend SQL databases in the site the Front End Pool is in, we are not stretching any SQL services over sites.


First things first, before failover over the Pool to the Backup Registrar there's other things to consider.

So how do we make the user that is currently connecting to access.exchange2010.com connect to the other Access Edge? In normal circumstances you don't have to worry about this as hopefully things won't break, but I found for the Lync client to successfully connect to a secondary Access Edge FQDN I had to ensure the second record was in public DNS with a different weight to the primary, or preferred Access Edge FQDN. Then in the event all your Edge servers were down, inaccessible, or failed it would automatically connect to the other Access Edge.

Example:


And utilizing the Weight:


If you didn't want to do this then simple updating your _sip records to point to an alternative Access Edge would be absolutely sufficient, or manually updating each client (not fun) to the alternative FQDN.


Now we've got that out of the way, let's look at invoking Pool failover when one Front End Pool is the CMS!


1. First of all confirm Replication is fine using Get-CsManagementStoreReplicationStatus, there's absolutely no point performing this failover if replication is broken (unless you are in a real DR scenario!)


2. If at this point we try to fail over the Pool in Site 1 that is the CMS, we will get a failure saying it is the CMS and the CMS must be moved, so let's do that. We simply use the command Invoke-CsManagementServerFailover, as the pools are paired this command will know to move the CMS over to the Backup Registrar, which is the Front End Pool in Site 2. Select Y to confirm the move.


3. Once the CMS is failed over we now need to perform another task before we can invoke a pool failover, we need to move the Edge Pool dependency. We do this using the Set-CsEdgeServer command (we can also use the Topology Builder, but the management shell is far simpler here, and in DR scenarios we may be stating away from publishing topologies until we are in a semi working state).

What we are doing here is removing the association of the Edge Pool in Site 1 with the Front End Pool in Site 1, and now binding it to the Front End Pool in Site 2.


4. We are now in the position to fail the pool over using the Invoke-CsPoolFailover command. This is simply run as 'Invoke-CsPoolFailover –PoolFQDN "Site 1 Front End Pool FQDN"'. If this is an actual disaster then we can also add the –DisasterMode switch, but if the pool is up and working there's no need to add this.


That's it, you'll find all users will switch over to using the other pool. Moving the users back is just a case of running 'Invoke-CsPoolFailBack –PoolFQDN "Site 1 Front End Pool FQDN"' – and don't forget to move the CMS back if you so desire!


Oliver Moazzezi - MVP Exchange Server