One of the benefits of performing a native Cutover migration is that distribution groups are created and memberships nested during the migration batch. Unfortunately Security Groups are not created automatically during a Cutover migration, however if they exist during the Cutover migration they will be populated and assigned their correct address, so we must pre-stage them prior to the mailbox moves.
So can we automate this? Creating them manually isn't much of an issue for relatively few, but when there are a lot some automation is appreciated and makes your job far easier.
So let's take a look.
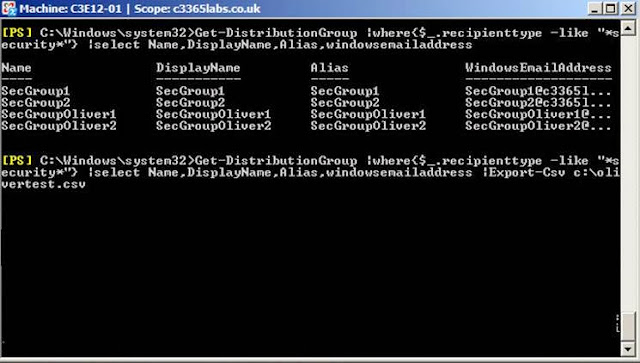
First of all let's take a look at the Security Groups.
Get-DistributionGroup |where{$_.recipienttype –like "*security*"}
Once happy, we can export them to CSV, taking the attributes we need for an import into Office 365.
Get-DistributionGroup |where{$_.recipienttype –like "*security*"} |Select Name,DisplayName,Alias,WindowsEmailAddress
Once happy, we can export them to CSV, taking the attributes we need for an import into Office 365.
Get-DistributionGroup |where{$_.recipienttype –like "*security*"} |Select Name,DisplayName,Alias,WindowsEmailAddress

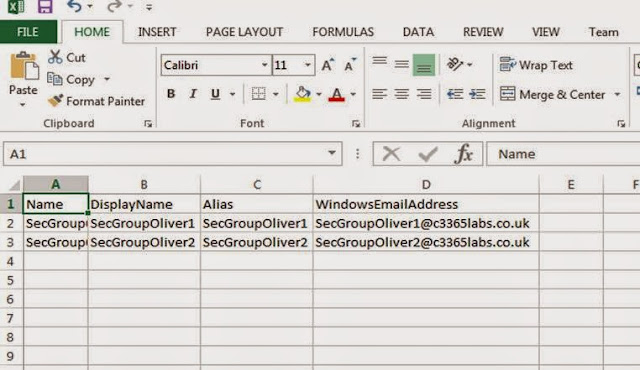
We don't actually need the Windows email address, but we can use the outputted CSV to check the default address after we have automated their import into Office365 and the Cutover migration has assigned the correct addresses.
So let's take a look at the CSV data – check it and ensure it is correct and the Name, DisplayName and Alias fields are populated:


When we are ready to import the Security Groups into Exchange Online, open a remote Powershell session to your tenant.
Once in, we need to import the CSV file and map the New-DistributionGroup creation to map the Name,DisplayName and Alias fields and also assign an @tenant.onmicrosoft.com address.
So how do we do this?
Import-Csv "csv location" |ForEach { $alias = $_.Alias; $primary = "$alias@c3365labs.onmicrosoft.com"; New-DistributionGroup -Name $_.Name -DisplayName $_.DisplayName -Alias $_.Alias -Type Security -primarysmtpaddress $primary}
We take the CSV and import it.
We create a For Each statement to loop through the CSV
We add some Variables to assign the alias name (it will have no spaces so is ideal) to the tenant email address.
We then utilize the New-DistributionGroup cmdlet and use variables to populate the Name, DisplayName and Alias' from the CSV and assign the aforementioned @tenant.onmicrosoft.com address.
Depending on how many mail enabled Security Groups you are importing this may take some time. But once completed you will see they have been created:
That's all for now.
Take care,
Oliver Moazzezi – MVP Exchange Server
Twitter: @OliverMoazzezi


No comments:
Post a Comment